Dashboard Widgets
Widgets are customizable components capable of displaying live information from various sources, including system devices, reports and notifications, among others.
Adding Widgets
Widgets live in Dashboard pages, so the first step to add a new Widget is selecting the Dashboard where it will be added. Once there, select the option “Add Widget” from the context menu at the right corner of the screen.

Adding a new Dashboard Widget
The following dialog shows the available Widgets arranged by category:
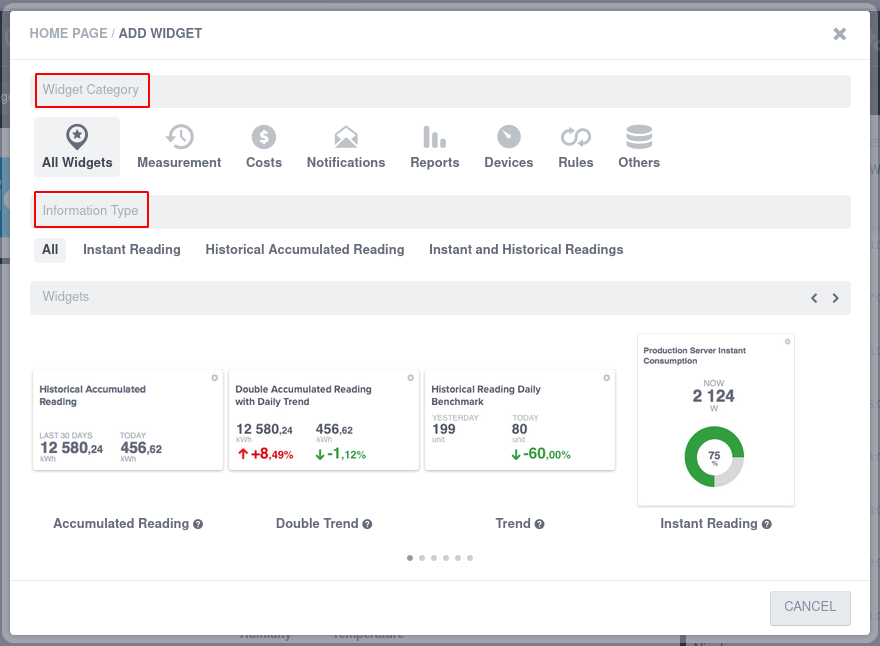
Adding a new Dashboard Widget The Add Widget dialog includes a preview and small description for each Widget.
- Measurement - Shows the readings for a given set of devices
- Costs - Shows the costs for a given set of devices
- Notifications - Shows the latest system notifications
- Reports - Shows a downscaled version of a chosen report
- Devices - Shows a device widget with readings and controls
- Others - Other widgets that do not fit any of the above
Navigate through the available categories to choose the Widget most adequate to the information needed.
This will initiate a sequence to configure the new Widget, where you will be asked to provided the necessary parameters to display data. See the sections bellow to know more about every configuration aspect. The blue glow around the Widget shows that it needs to be moved into an empty place in the Dashboard page. At the end of the process the Widget will be added to the current Dashboard. If that Dashboard page already had widgets in the same position, the new Widget will be shown with a pulsing blue glow effect. This signals the need to move the new widget to a different position, which can be done by dragging it into an empty space.
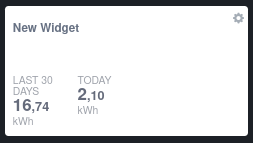
Further changes to the Widget configuration can be made anytime, by clicking the button at the top. (Image bellow)

Organizing Widgets
Widgets can be organized within your Dashboard pages, either by moving them in the current Dashboard (drag-and-drop), or by moving/copying them to another Dashboard.
Relocating Widgets
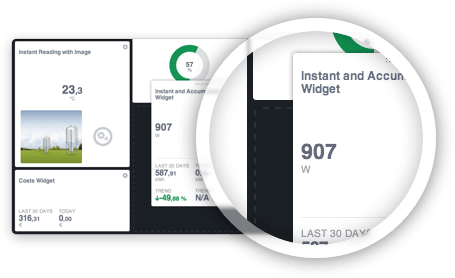
Overlaid Widget While dragging a Widget a dashed line underneath will signal the new location for it.
To arrange the Widgets within the Dashboard, just move your mouse hover the Widget to be displaced. A small handle will descend from the Widget top, which you then can grab (click and hold), initiate the drag movement to the new position, and then drop (release mouse button) to complete the action.
While moving your widget, a small representation of the Widget size and placement will be shown underneath, allowing to preview where it will stand once the mouse button is released.
Copying Widgets
In some occasions you might need multiple instances of the same Widget, with just a few configurations changed. In those circumstances the duplicate feature becomes really handy, allowing you to configure a single Widget and then duplicate it multiple times. The option is available at the top of the Widget settings window, with the button. (Image bellow)

Move Widgets between Dashboards
To move a Widget to a different Dashboard page, open the Widget settings and press the location button at the top. In the following dialog choose the new location where the Widget should be moved to.
Deleting Widgets
To remove a Widget from your Dashboard, open the Widget Settings and press the Delete button at the bottom.
Widgets Settings Reference
The required settings varies accordingly to the Widget you’ve chosen. Find bellow a quick reference to the most common parameters:
- Title - Widget brief description shown in the Widget body
- Unit - Reading Unit. Only devices compatible with this unit will be available for selection. With Widgets containing both Instant and Accumulated readings you’ll be asked Units for each one.
- Devices - Select which devices will be considered for the Widget value readings. See also Device Picker
- Device Operation - When more than one device is selected, this will define if the displayed value should be a sum or average calculation.
- Image - Opens the Image Library for selecting an image to display the Widget. See also Image Library
Link Navigation Options
Each Widget has the ability to navigate the user to other part of the application, simply by clicking on the Widget itself. Some Widgets do this by default, others have the following interface for the user to set it’s own navigation options:
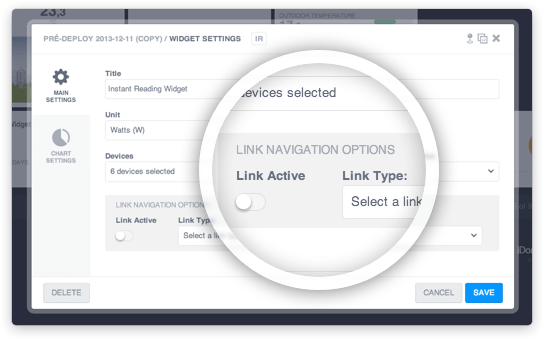
The options available varies according to the type of Widget being edited and may not correspond exactly to the image above.
Widget Range and Chart Visualization Options
Available for Widgets with Instant Readings, these settings will define the selected devices optimal operation range. That in turn will enable the application to draw a real-time chart representation.
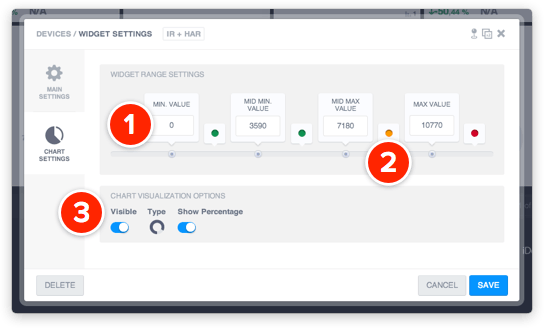
See reference bellow:
- Set the Operation Range for the selected devices.
- Set the desired color to represent each range interval.
- Set the visualization options.
