Add a new Rule
In this guide we will add a rule that will activate the air conditioning when the temperature of the office is higher than 24 degrees, that is, when the temperature is equal to 25 degrees, the air conditioning will be turned on.
To add a new rule, follow these steps:
1. Go to Control Center, and choose “Add Rule” from the Context Bar dropdown menu at the top.

2. The following screen will give you a set of Rules Templates from which you should pick the most fitted for the outcome to be achieved. Next to each Rule template there are two buttons, one for open the Rule description and another for selecting that Rule and move to the next step.

3. After selecting your template, the next screen will show you a combination of Rules criteria that may include:
Rule Details
In the details you have to define the zone where the rule will be and also the respective name.

Rule Devices
Select which devices will be read or acted when the rule conditions are met. In this case, the office temperature device will be selected.

Rule Parameters
They will depend entirely on the Rule template used. Rule Parameters typically are used to set devices operation values, instructing the system to react until those values are reached. Here we say that the rule will work when the value is greater than 24 degrees.

Rule Actions
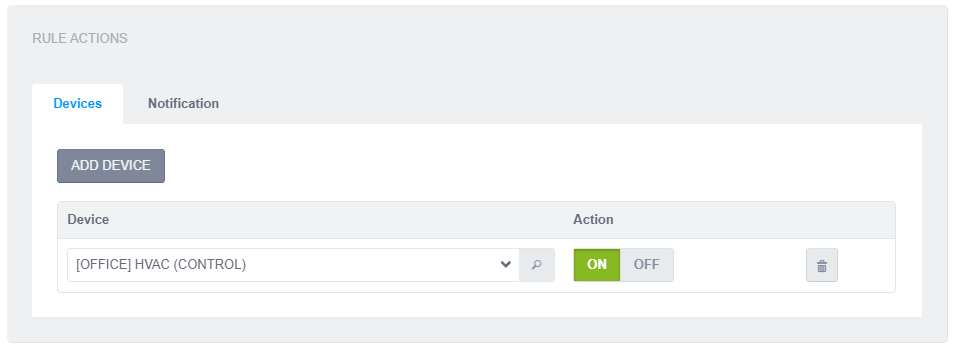
Rules Actions are divided in two possible outcomes: Device actions and Notifications. With Device actions you will be able to instruct devices to change state (On/Off) once the rule conditions are met. That event can also trigger the second possible action - Notifications - which can generate Dashboard and Email messages.
Read more about Notifications:
In this case we will say that when the conditions defined in the parameters are true, the air conditioning device will be activated.

Rule Schedule
Schedule when and for how long should the Rule actions execute.
Rule Actions Rules Schedule sample for a generic Rule template
Once everything is setup as desired, press the Add button at the bottom to save your work.

4. Once everything is setup as desired, press the “Add” button at the bottom to save your work.
