Systems Classification
Systems Classification is a categorization system for Cloud Application Systems, which will help to better manage all the systems.
The Systems Classification consists of assigning categories, differentiated by colors, that will allow the user to easily identify and filter the Cloud Application Systems from it’s Entity.
Systems Categories
System Categories can be created by navigating to the Entity App, selecting Entity and then selecting the Systems Categories tab.
Here the User can create new categories and/or edit the existing ones, including edit the Default Category’s colour.

Add Categories
To add a new category, click the button “ADD CATEGORY”.
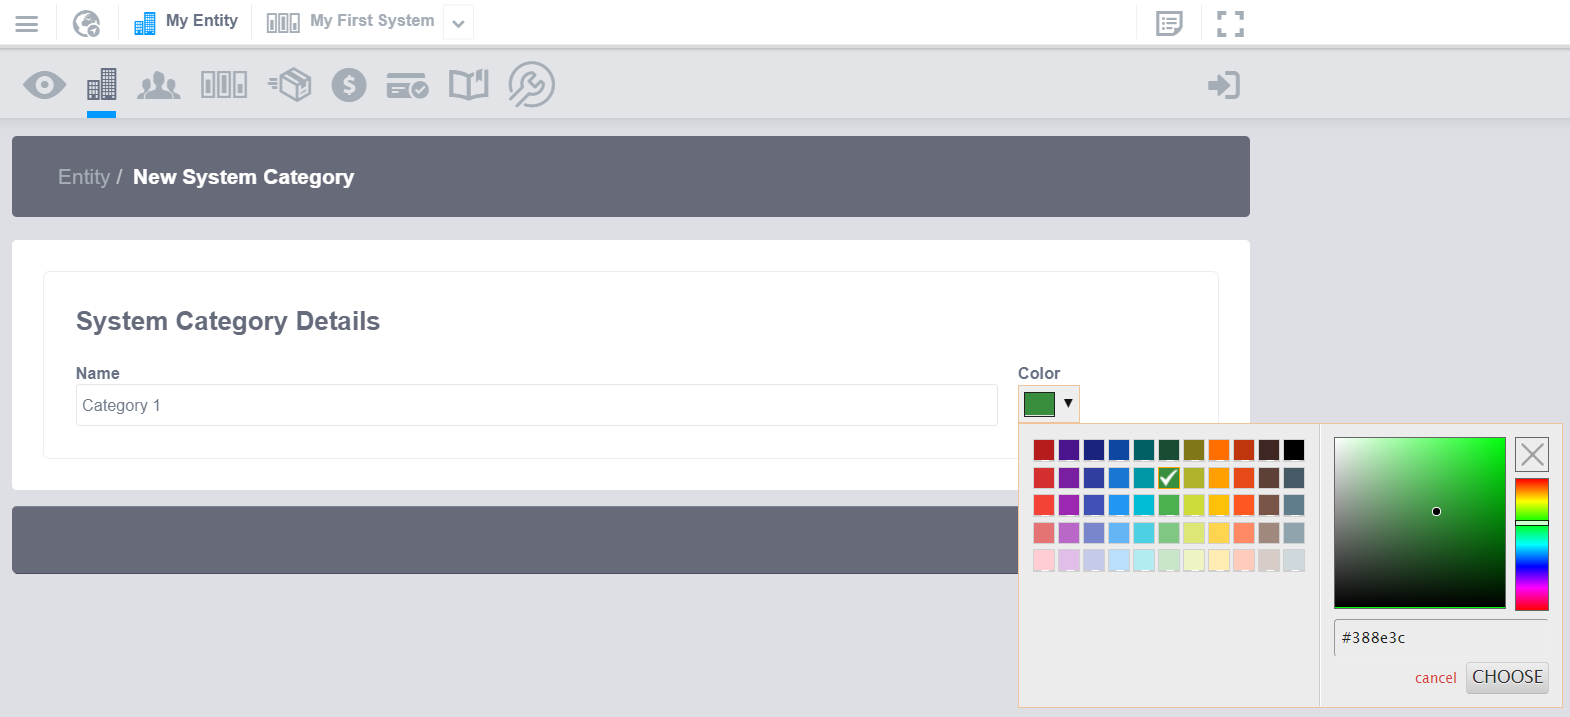
Then Define a name for the category and select the colour.
You can choose from the available colours or you can use hexadecimal colour codes to select the desired colour.
Once selected, click “CHOOSE” button.
Once you have created all your categories, you can go to Systems to assign them with categories.
To go to systems,click on the sistems icon at the top.

Assign Categories to Systems
All Systems, when created, are assigned with the “Default Category” and its default colour. But the user can change this default catgory at any time.
Navigate to to Systems within the Entity App, and here you can see the list of Systems and its category colour. If you have not made any changes since the System’s creation, all must be with the Default Categorie’s colour.
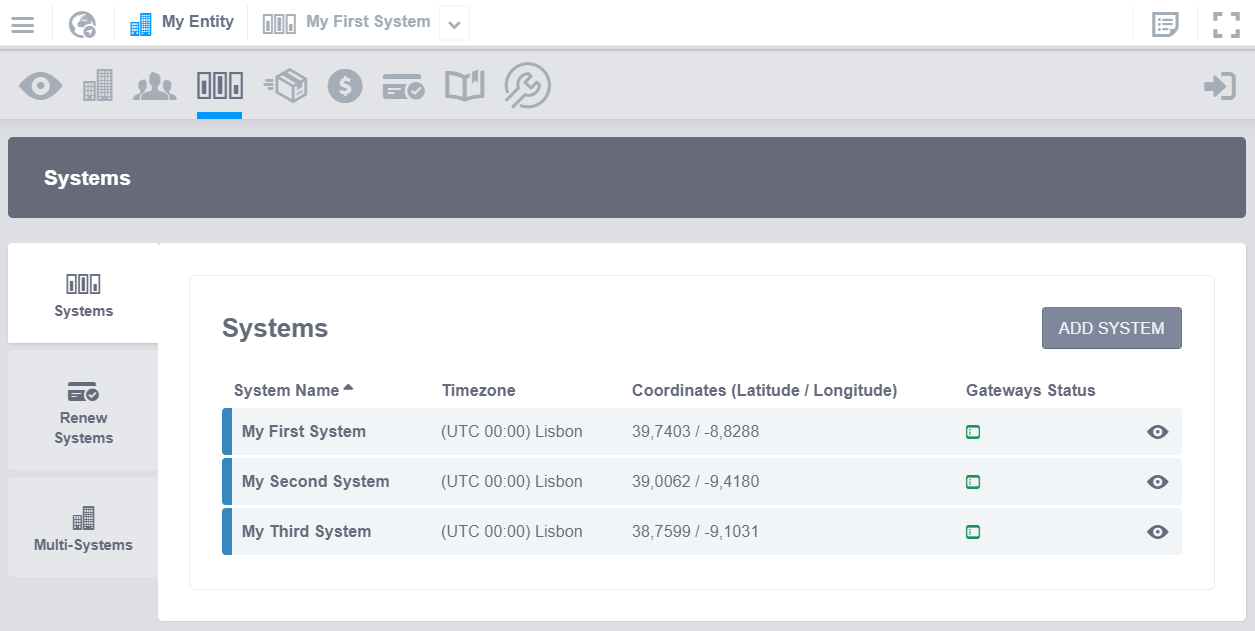
Select the system to edit by clicking on its name or the eye icon at the right end.
Then, on the Details tab, click on the edit button at the upper right corner.
Then you can select which category to assign from the System Category drop down list.
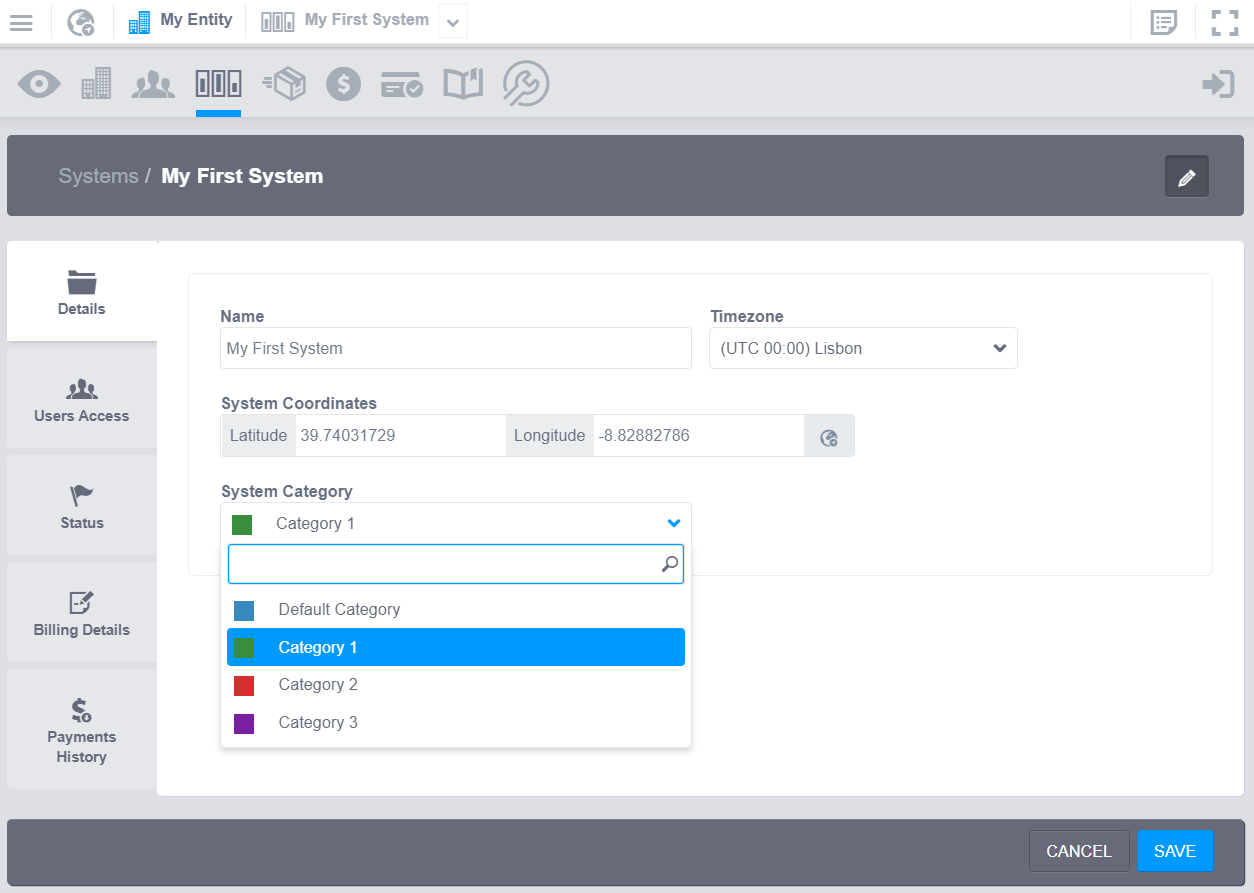
Click “SAVE” and it is done.
Map
Once all systems are correctly categorized, you can go to the Map visualization, by clicking the Map icon at the top white bar.
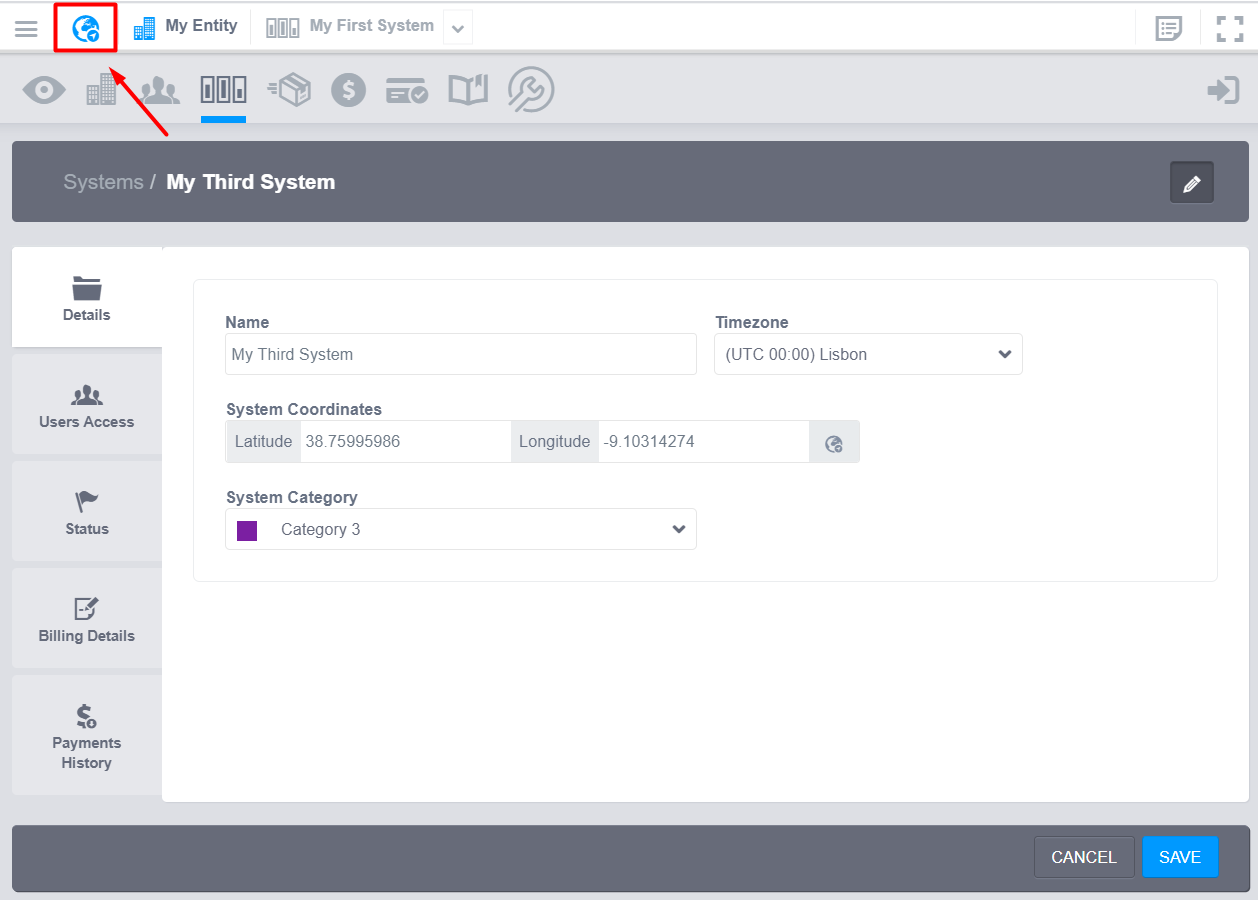
Here you have an overview of your Systems geo-location, represented in the map as a colour dot, with the System’s category colour you have assigned.
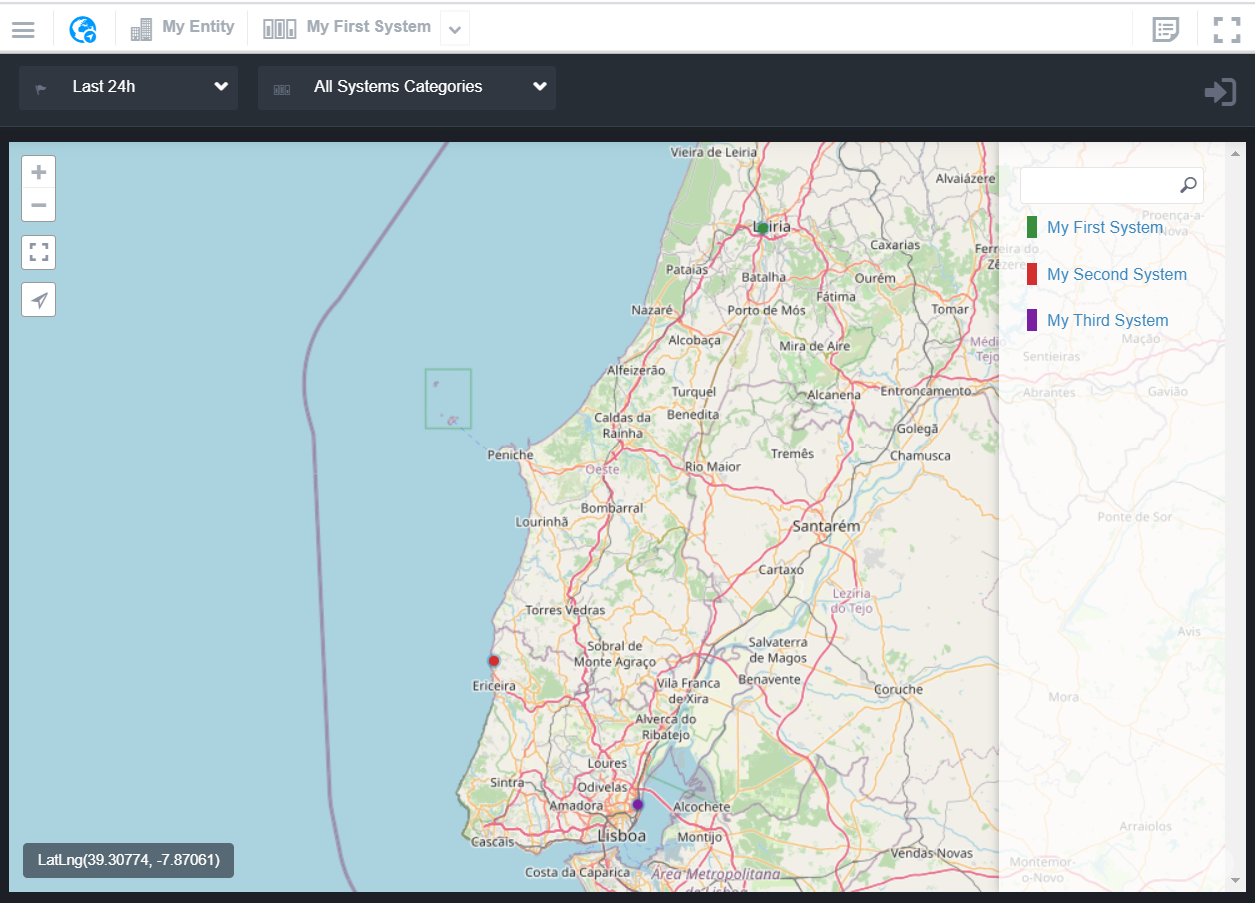
Create a warning to advise that if there are no dots in map, user has to go to Systems and insert the GPS coordinates.
Filter Systems by Category
At the top you have a drop down selector wich allows the user to filter systems showed in the map, by its catgories.
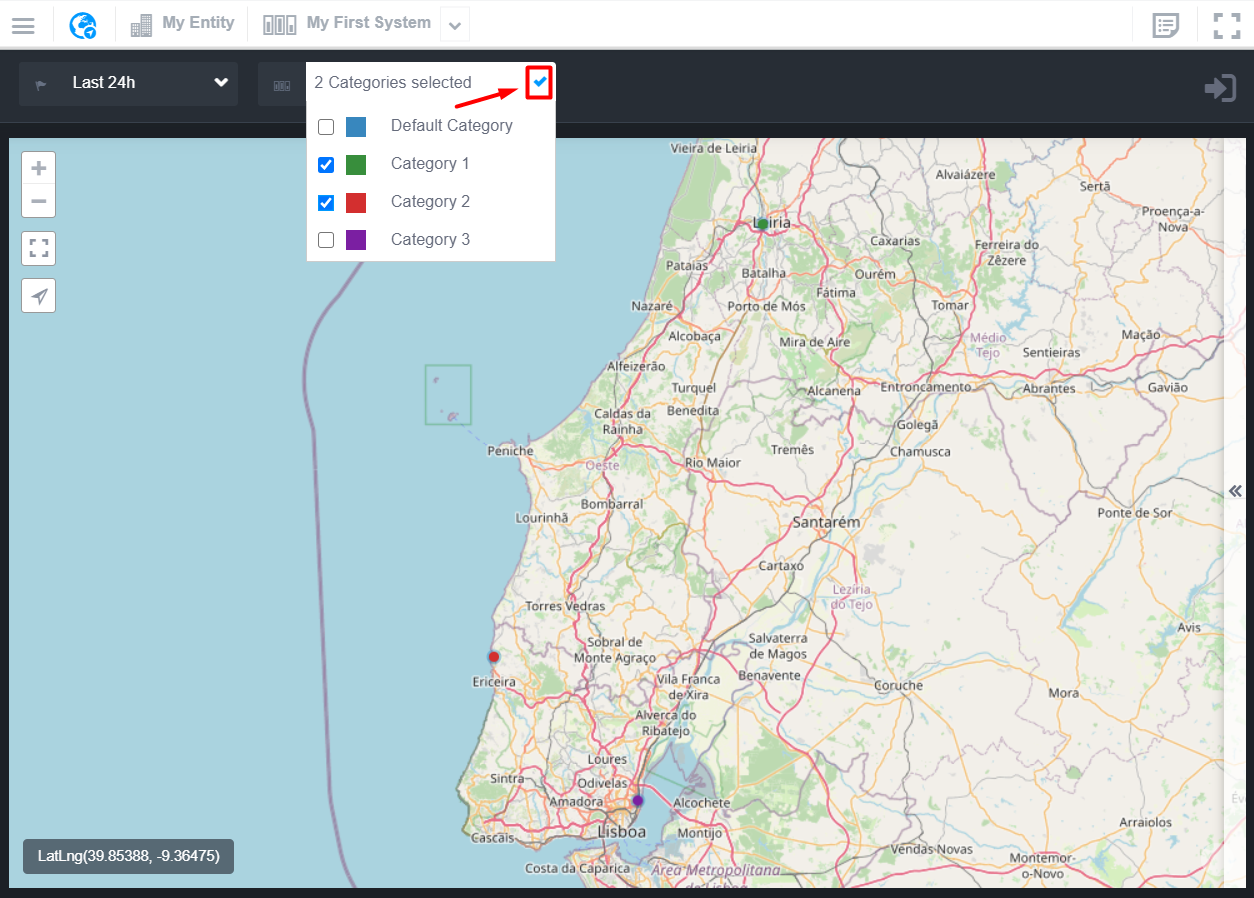
To select the categories to show, click on the tick box at the left, and to validate your filter, click on the “validation icon at the top right corner of the drop down selector.
To navigate to any system represented on the map, click on the System’s dot and then click on the System’s name.

